AAA Birthday – Game #22 – A Large Sentiment

Well it’s February already and time for shouting out Happy Birthday in a large format.

Congratulations to our guest designer this month – Helen. Pop over to the AAA Birthday blog to see what Helen has designed for her guest spot for this months challenge and be inspired by the rest of the Design Team cards.

One of my favourite stamp companies is Avery Elle and I recently purchased this yummy “Cake for All Seasons” stamp and die set.

Continue reading

Inkspirational Challenge #229 – Something in your home

I am entering this card in the current Inkspirational Challenge #229 and the theme is something in your home. For the last two Christmas’s I’ve had a summer themed Christmas tree (see picture below) as we are in the southern hemisphere and I want to reflect the season. This year I added some cross stitched ornaments (not made by me!). I took the floral, colours and cross stitch as my inspiration for this card.

Continue reading

Cast a Spell

I have recently purchased a couple of new stamp sets from Whimsy Stamps and it was perfect timing to enter a card in the current Sisterhood of Snarky Stampers Challenge #159 – M is for Magic.

products used

  • Whimsy StampsCreate Magic and Cast a Spell
  • My Favorite ThingsBlueprints 29 dies
  • Altenew Tiny Stars
  • Tonic Studios – Verso Framed Screens die
  • Distress Oxide Inks – Blueprint Sketch, Salty Ocean, Wilted Violet
  • Copics – see colours below
  • Ranger Fine Detail embossing powder – White

Background

  • Using Distress Oxides – ink blended three colours randomly over background. Repeat until desired colour depth achieved.
  • Making sure ink is dry (blast it with your heat gun to speed drying up), stamp Tiny Stars randomly over background using Versamark Ink, turning stamp around to achieve a more random layout of stars. Sprinkle embossing powder over, tap off excess and set with your heat gun.
  • Die Cut background using the Verso Frame (also diecut the cardbase using the larger die to have a slightly shaped card).

Images

  • Stamp images on your preferred copic friendly cardstock and fussy cut up to stamped edges. Colours used as follows:
imagecolours
ScrollW0, W1, W3, W5
Spider and ShoesV12, V14, V17
Cider jar, trim on wizard and tabG12, G14, G16, G17
Wizard clothesB000, B00, B02, B05 B18
SkinE0000, E00, E02, BV01
Facial HairC0, C1, C3, C5

Extra items

shelf and tab

  • Blend copic ink over cardstock (using same blues and greens as in other images)
  • Die cut shapes

Wizard’s stars

  • I initially coloured the stars but as I fussy cut the wizard out I realised that the stars were going to be too fiddly to fussy cut so I cut them off.
  • I still wanted the stars to feature so I stamped them onto a piece of acetate using Versamark Ink. Note: Make sure you use plenty of antistatic powder on the acetate to stop excess powder sticking to acetate – it’s tricky to remove otherwise.
  • Sprinkle on Fine Detail embossing powder and tap off excess. Heat set CAREFULLY with heat gun so you don’t melt the acetate.

Sentiment

  • Stamp Sentiments onto Scroll and Tab with Versamark Ink and sprinkle over embossing powder and tap off excess.
    • Zing Embossing Powder – Purple
    • Ranger Fine Detail embossing powder – White
  • Set with heat gun.

Finishing

  • Using ATG adhere background to card base.
  • Adhere all images using a mix of glue and dimensional adhesive foam tape.

Thanks for stopping by and have a good day.

Handmade by Pip


21st Congrats

A new card created for a family member. I wanted to try a new technique for the background I had seen recently and it worked perfectly…foiling with gel medium.

Images

I used the Waffle Flower Little Painters images as they are designed to poke out from behind another image, plus they’re very cute.

  • Stamp your images on copic friendly cardstock with Momento Tuxedo Black or another copic friendly ink.
  • Colour with alcohol markers.
  • Cut out with matching dies, Brother Scanncut or fussy cut.

Background

  • Ink blend background with Distress Oxide Inks in Salty Ocean and Tumbled Glass and Mermaid Lagoon. Leave to dry.
  • Place stencil – My Favorite Things Star Celebration – onto card and tape down to crafting surface to stop stencil and card moving.
  • Using a palette knife spread Atelier Heavy Gel medium over stencil.
  • Remove stencil carefully and leave panel to dry.

Tip: The gel medium is dry when the gel becomes transparent and drying times will vary due to climate.

Foiling

  • Heat up laminator – Mine is the Heidi Swapp Mini Minc machine.
  • Place a sheet of foil over the dry panel. I used Gina K Design Heat Reactive Foil.
  • Place panel and foil in a carrier pouch – you can use a folded piece of copy paper if you don’t have the pouches.
  • Run through laminator. I set the heat at a 4. The heat will reactive the gel medium to make it sticky and the foil will adhere to it.

Extra items

Congratulations

  • Cut out My Favorite Things Congratulation circle die out of white cardstock and once out of blue fun foam. Using a blue marker that matches the blues in the card colour the die cuts.
  • Adhere the coloured die cut onto the foam one.
  • Cut out a piece of vellum with a circle die and adhere to the back of the stacked die cuts.

Foiling Numbers

  • Cut the numbers out of cardstock using Altenew Bold Numeral dies.
  • Use the negative portion like a stencil and place on top of another piece of cardstock.
  • Using a palette knife spread Atelier Heavy Gel medium over numbers then remove stencil.
  • Leave to dry, place foil over top and run through a laminator as you did for the background stars.
  • Fussy cut around the numbers or use the original dies to recut the foiled numbers.

Finishing

  • Adhere the critters when you want them positioned. The two back ones are adhered to the congratulations and the front one is adhered to the number.
  • Adhere the numbers with two layers of foam tape to give them dimension and make them slightly higher than the die cut words.
  • Finally adhere the central images to the background and adhere panel to side or top folded cardstock.

Thanks for stopping by and have a good day.

Handmade by Pip


Supplies List

Affiliate links are used when purchasing from Krafters Cart. Other links are direct to the company that sells that product.

Waffle Flower Little Painters
Shop at:
Krafters Cart NZ
MFT Star Celebration Stencil
Shop at:
SSS
Altenew Bold Numerals Die
Shop at:
Krafters Cart NZ
MFT Congratulations
MFT Congratulations
Shop at:
Krafters Cart NZ
Gina K Design Heat Reactive Foil
Shop at:
SSS
Distress Oxide Salty Ocean
Shop at:
Krafters Cart NZ
Distress Oxide Mermaid Lagoon
Shop at:
Krafters Cart NZ
Distress Oxide Tumbled Glass
Shop at:
Krafters Cart NZ
Tools Mini Misti
Tools Mini Misti
Shop at:
Krafters Cart NZ
Momento Tuxedo Black
Shop at:
Krafters Cart NZ

Buzz…buzz…buzz

Have you heard the Buzz? This is my entry for the current Color Throwdown #ctd456.  A new stamp set from Honey Bee Stamps ‘Busy Bees’ with the matching sentiment set ‘Bee-You-Tiful’. Heard the Buzz-1swatch456

I started with stamping the background with the Concord & 9th ‘Stripe Builder’ and Altenew Crisp Dye Inks and practised my plaid background designs.  I then simply stamped the images I wanted to use, coloured them with copics and  cut them out with my Brother Scan n Cut.  I popped the images up with various heights of foam adhesives to add extra dimension.

Heard the Buzz-1-2Heard the Buzz-1-4


The extra little dotted flying lines and a few mini jewels in the centre of the flowers finish it off.

Handmade by Pip


Supplies

Stamps: Concord & 9th, Honey Bee Stamps

Colouring: Copics

Inks:  Altenew Crisp Dye Ink

Cardstock:  Base Cardstock Advance A4 300gsm Long Grain Laser, Fabriano Illustration 250gsm


Pink, Green & White…

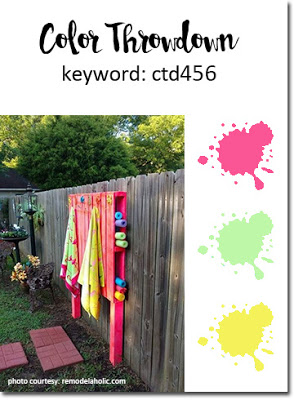
I’ve had a really busy last week and haven’t done much cardmaking so decided to use a card challenge to kickstart myself again!

swatch451

I wanted to use some of my Memory Box floral dies and this colour scheme screams flowers. The Memory Box dies are great because you can use the outline alone, the outline and internal shapes together or just the internal shapes.

Pink Green and White-1-7

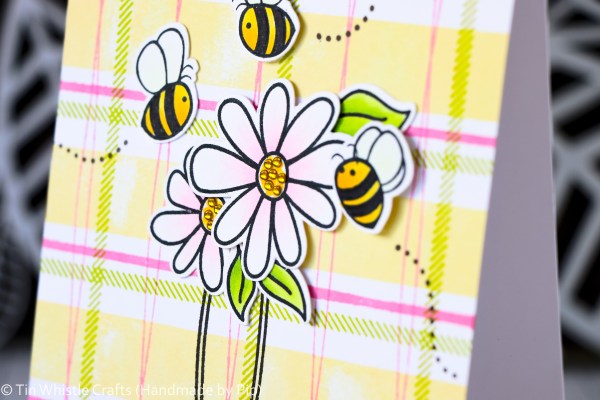
I first swiped Ranger Distress Inks in ‘Spun Sugar’ and ‘Picked Raspberry’ over card stock so I could die cut the flowers out.  I decided not to use the stem portion of the die and simply cut that off.  The dots in the centres of the flowers are Nuvo Crystal Drops in ‘Apple Green’.  The sentiment, from the My Favorite Things ‘Label Love’ is stamped in Altenew Crisp Dye Ink ‘Parrot’.

Pink Green and White-1-3

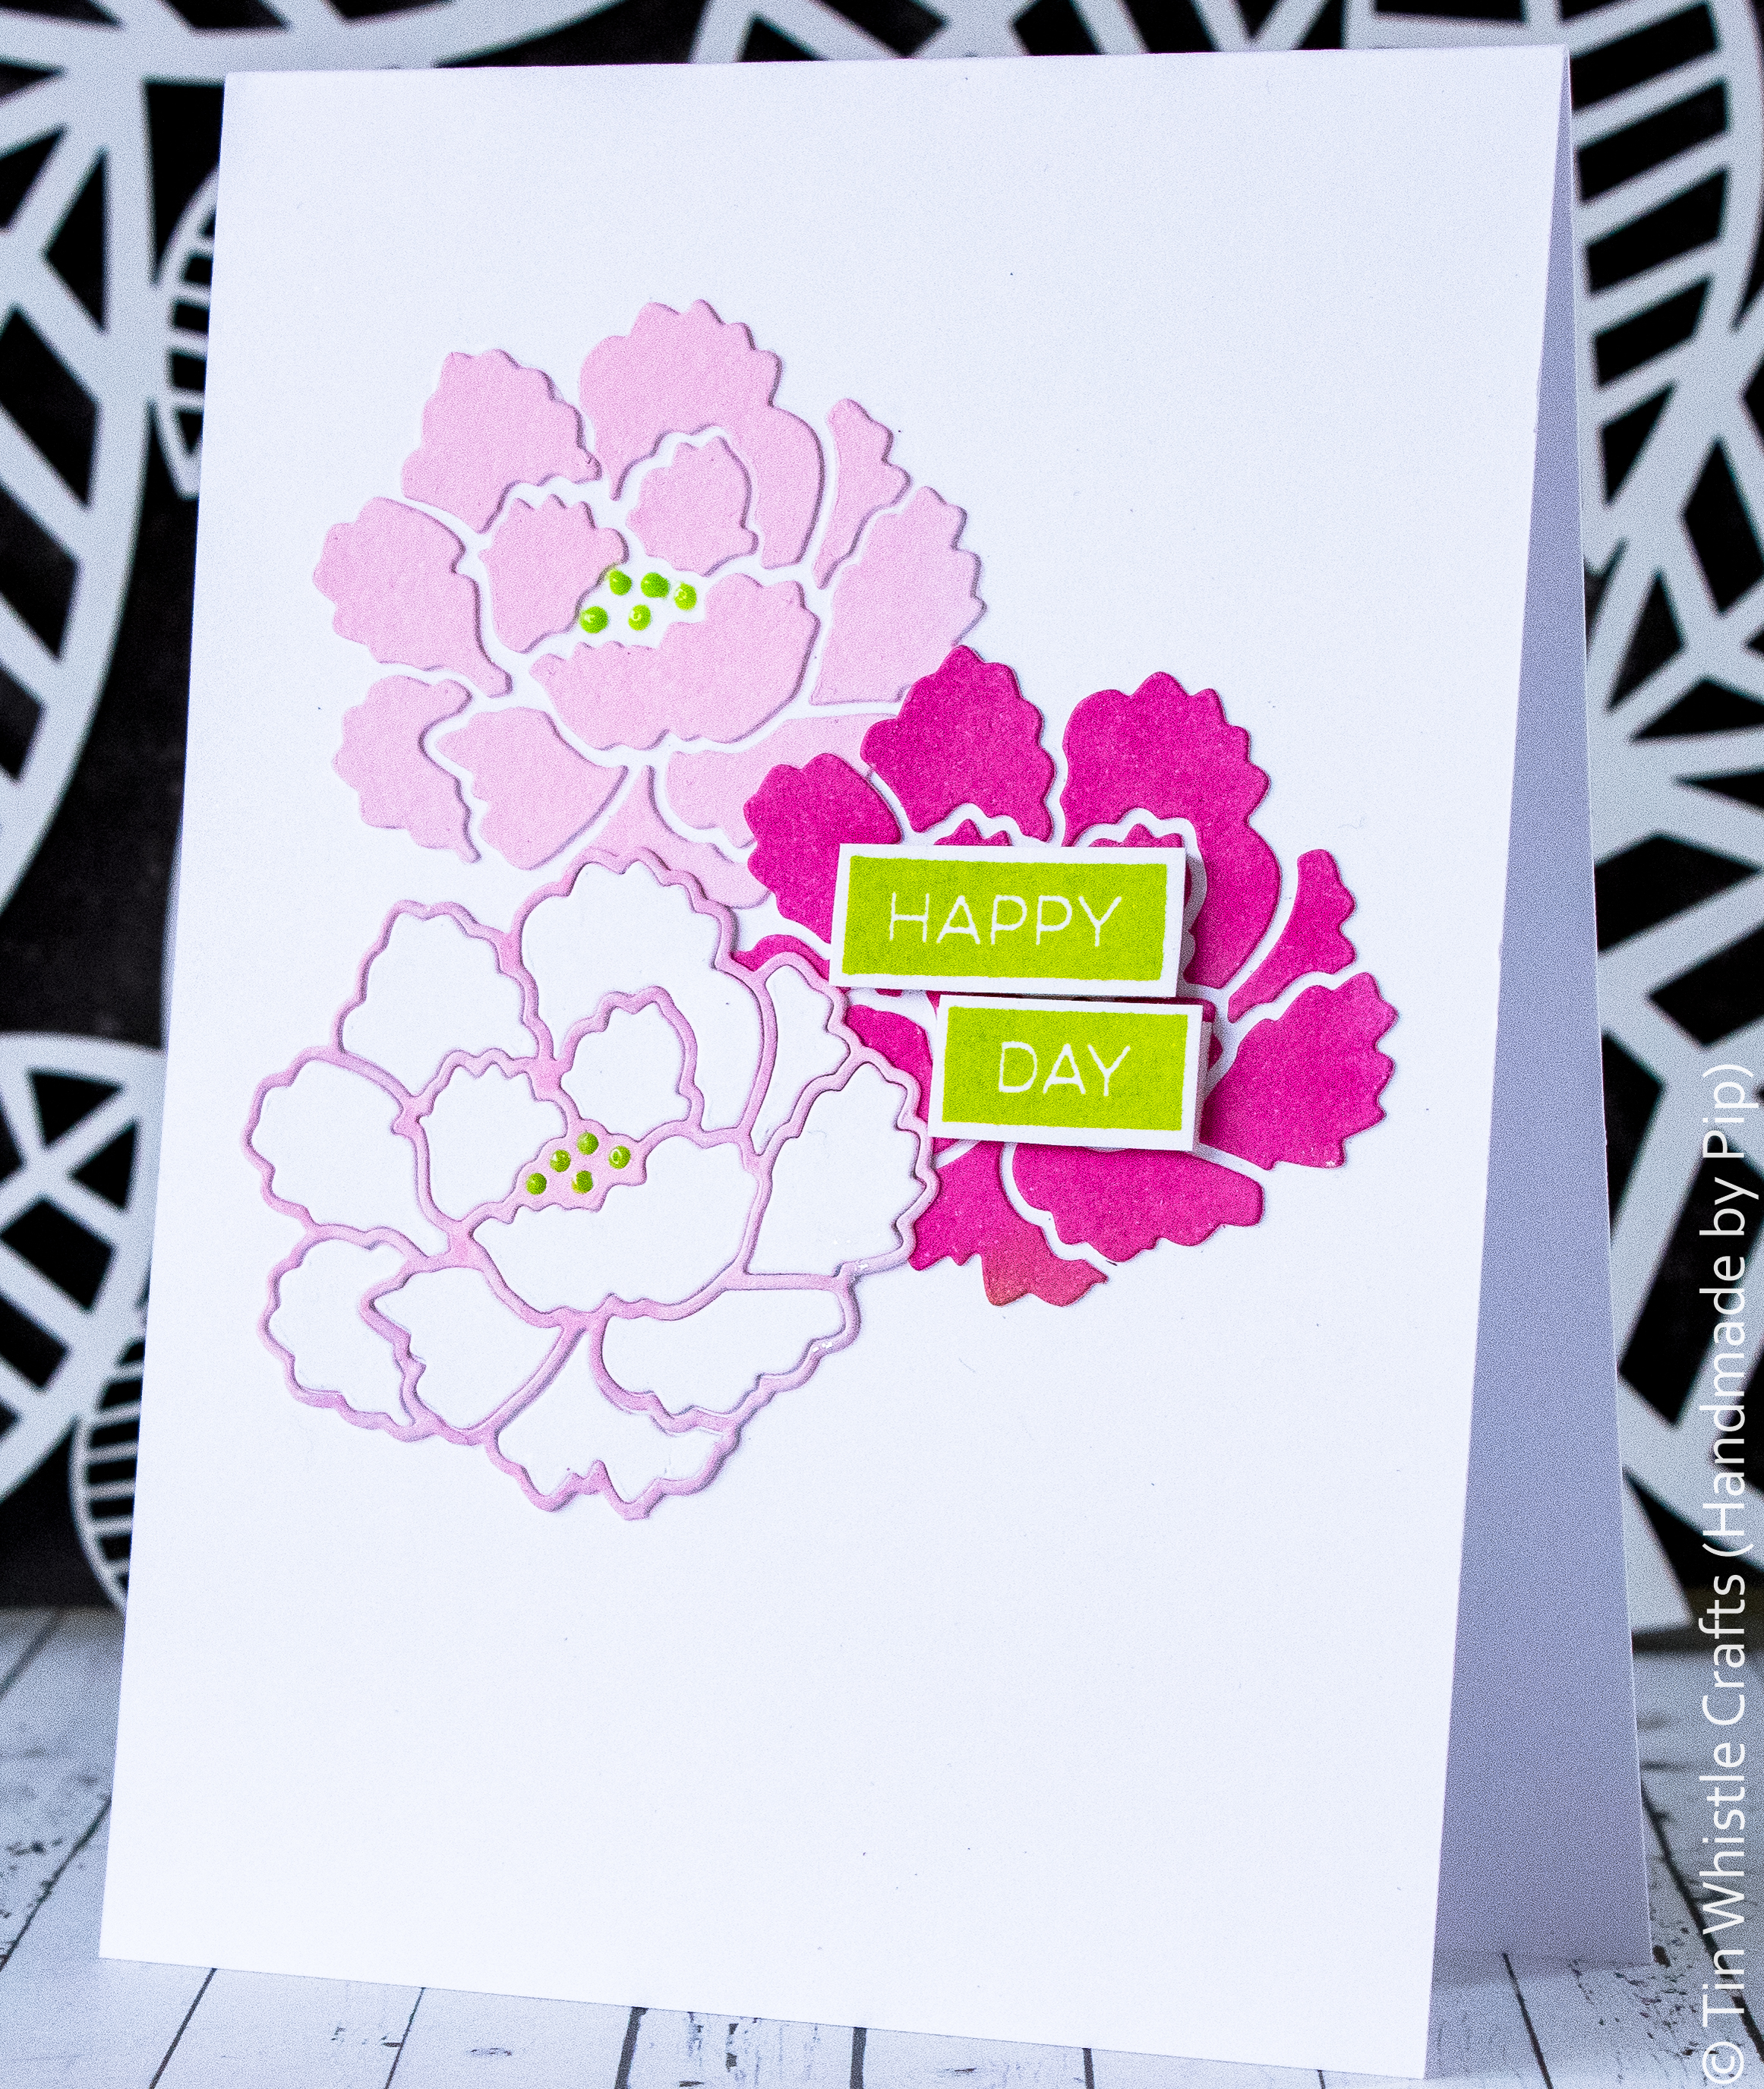
I decided to make a couple more cards with the same colour scheme but a different die from Memory Box – ‘Budding Peony’ and using Nuvo Embellishment Mousse ‘Citrus Green’, ‘Peony Pink’ and ‘Pink Flambe’ instead of Distress Inks, to add a bit of shimmer.

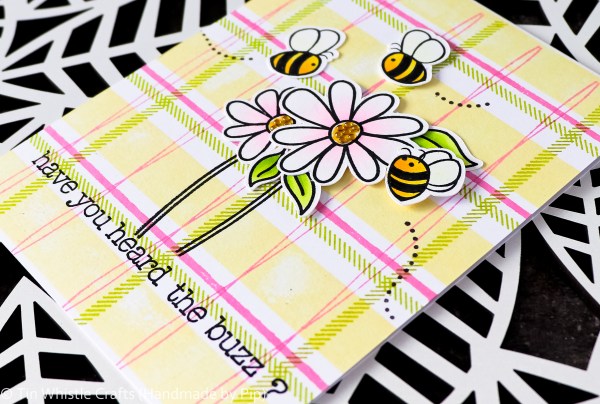
The sentiments are from Paper Smooches and Altenew and I decided to play with the placement a bit as I had seen a fabulous card by May Park of Mayholic Design using the sentiment as the stem.

Hope you enjoy them.

Handmade by Pip


Supplies

Stamps: Altenew, Paper Smooches

Dies: Memory Box

Inks:  Ranger Distress Ink, Altenew

Other Multi Media: Nuvo Embellishment Mousse

Cardstock: Advance A4 300gsm Long Grain Laser