
Living in the Southern Hemisphere we…usually…have a hot Christmas. Here is my take on a summer themed Christmas card.


Living in the Southern Hemisphere we…usually…have a hot Christmas. Here is my take on a summer themed Christmas card.

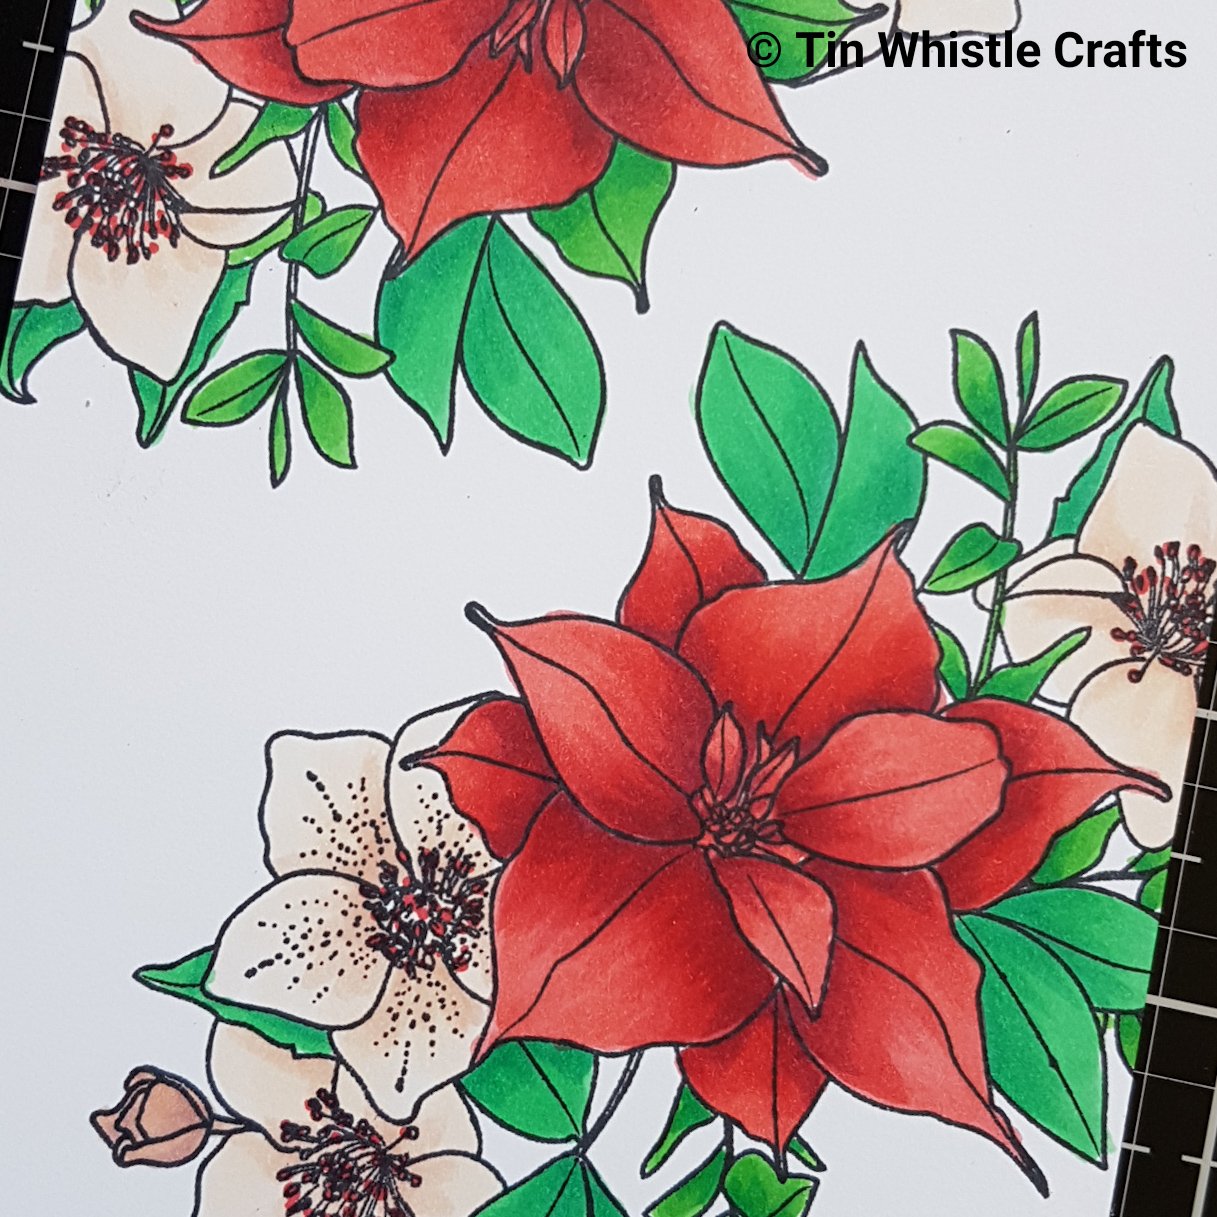
I am entering this card in the current Freshly Made Sketches challenge – #447. I love the images from Lily of the Valley so I chose this winter themed one to colour with copics. I had some many ideas to include in this card and I love how it turned out.


Finally used one of those techniques shown on YouTube (you know the myriad of crafty video tutorials we all watch but never get round to trying)…and it turned out better than I imagined.
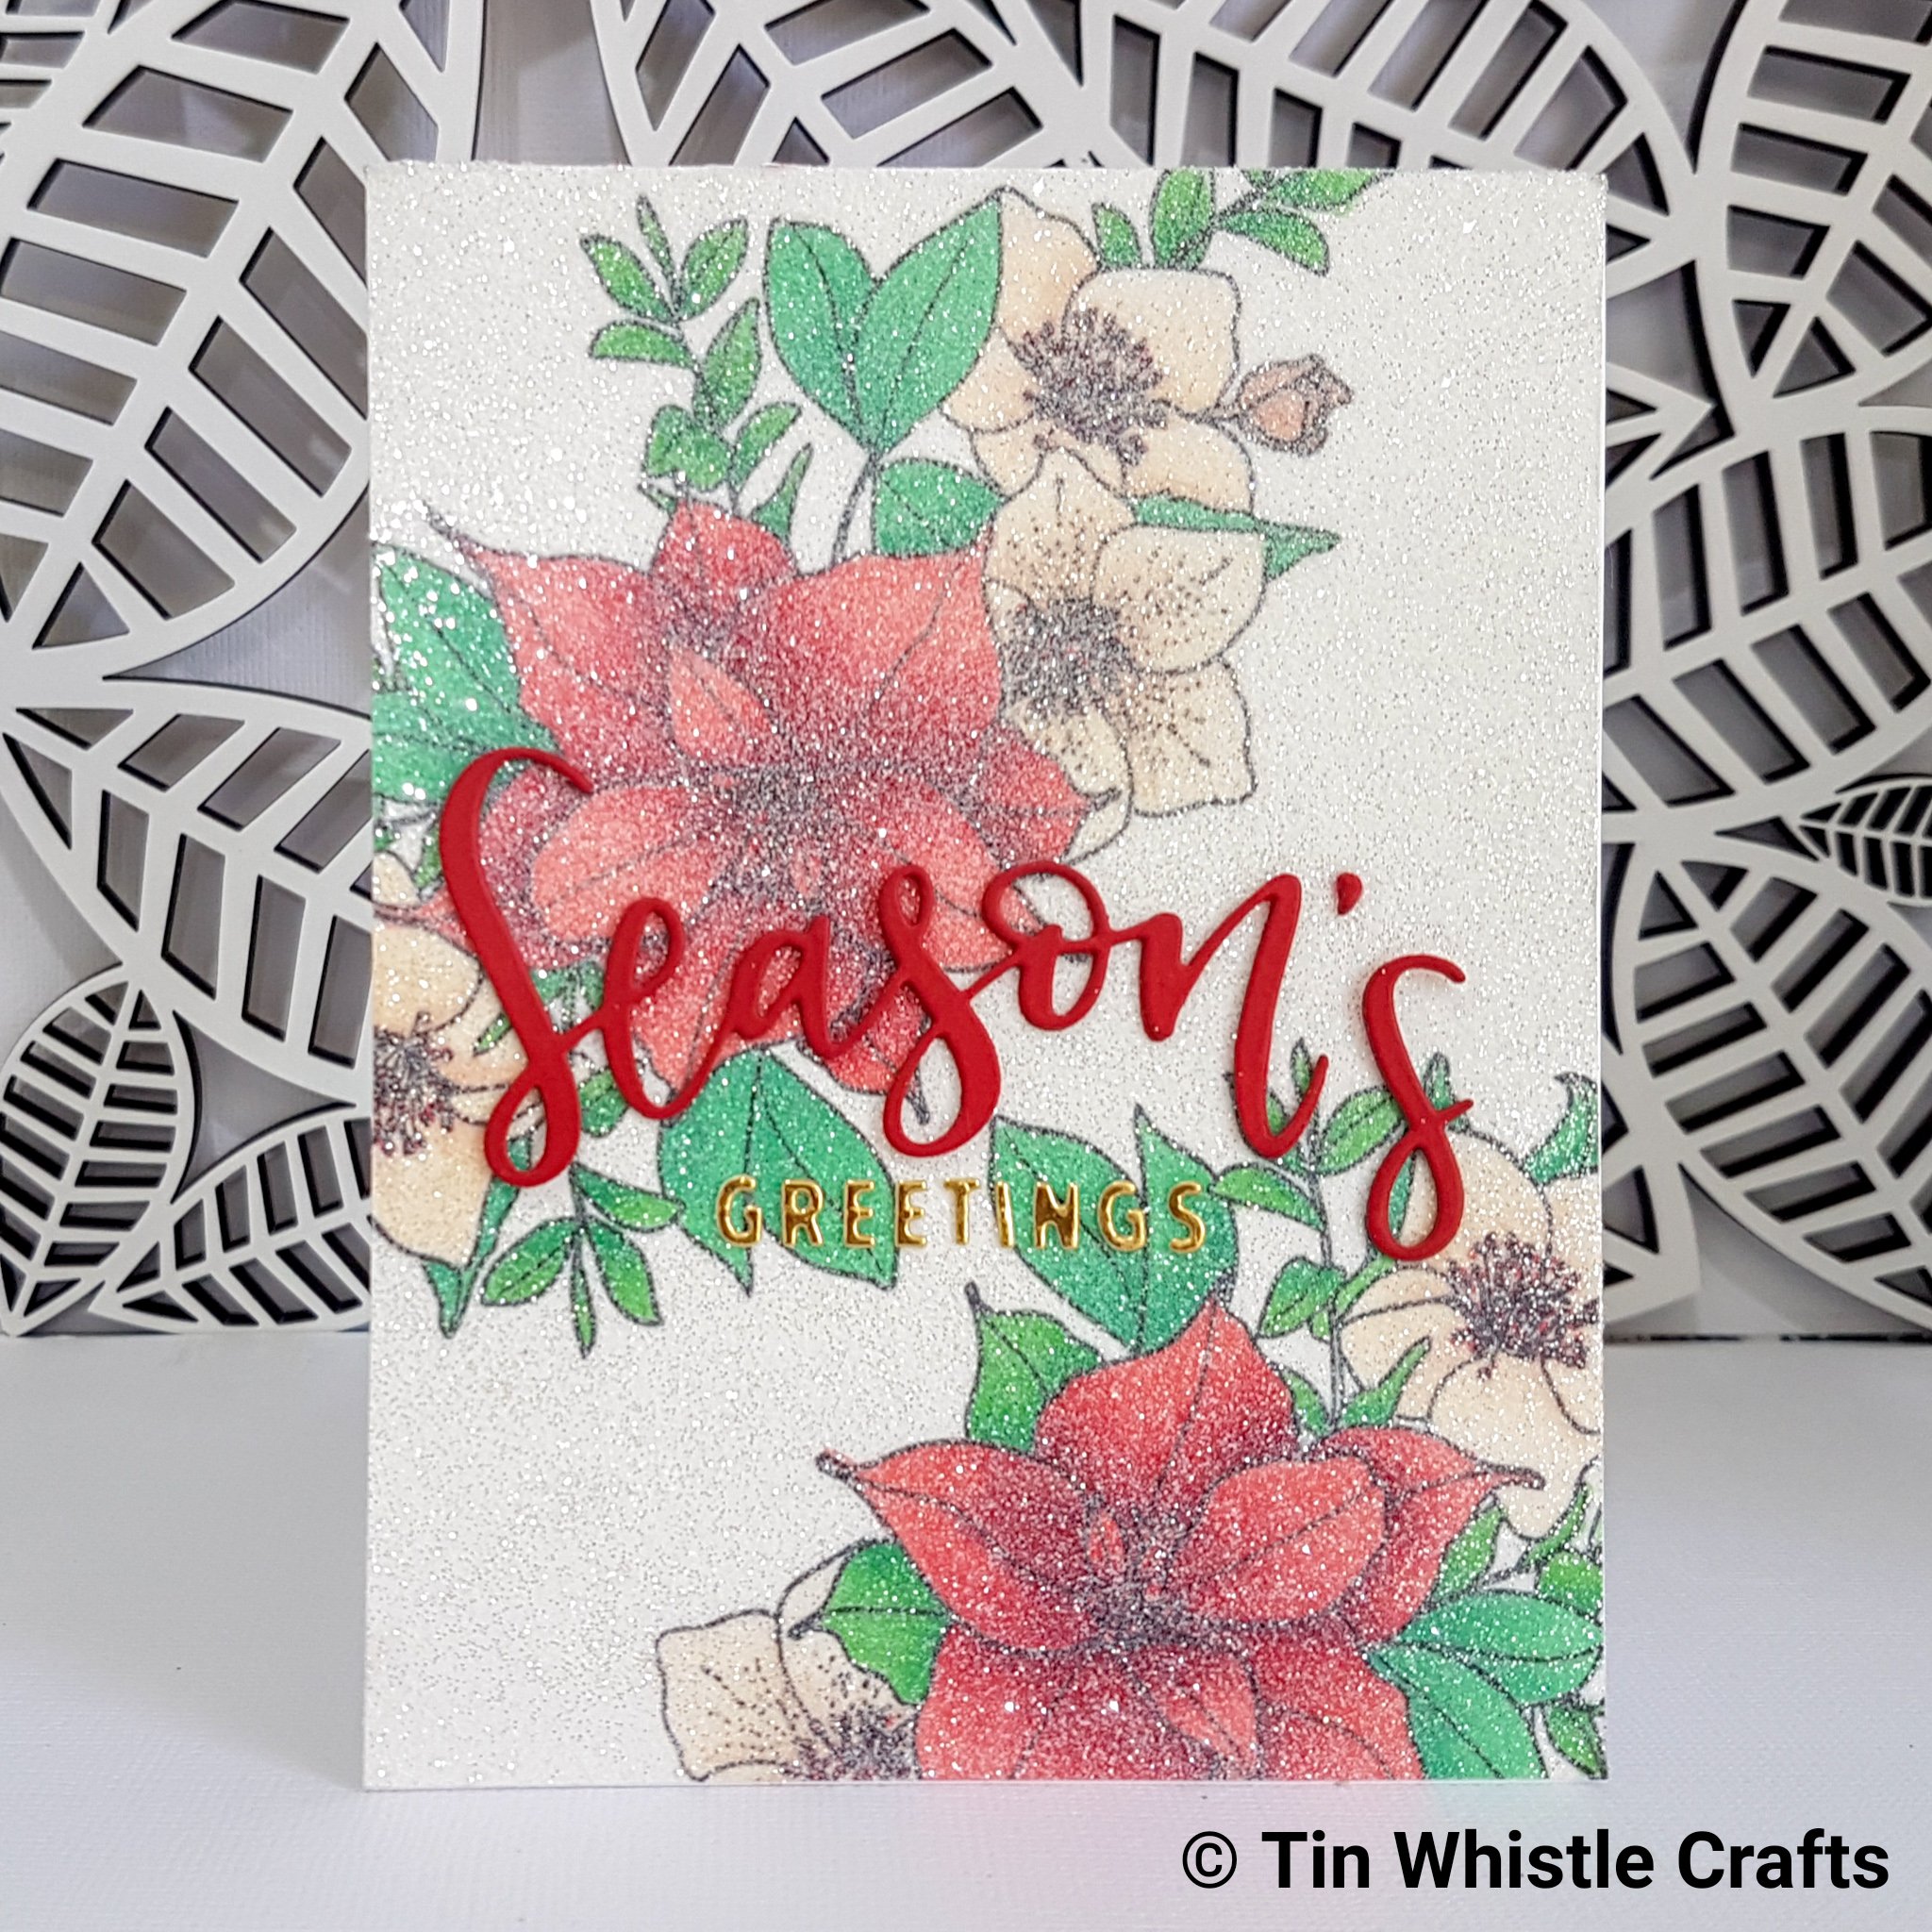
I used the Christmas Rose Bouquet from WPlus9 and the dies from Concord & 9th Season of Cheer. After colouring the image that I had stamped twice onto copic friendly cardstock all that was left to do was complete the frosting technique.
Before I committed to frosting the panel I decided to try my glitter on a smaller image just in case it covered up too much of the colouring.

The frosting technique is just double sided adhesive (I used Elizabeth Craft Tape which is very thin) adhered over the image and then glitter sprinked on top and burnished with you finger. Shake any extra off.
TIP: Head over to Therese Calvird’s blog at http://www.lostinpaper.com if you want to watch a video of this technique. or find her on YouTube.
Hope you try this soon. I’ll definitely be making a few more cards using this technique.


This month’s Challenge for Concord & 9th is “Anything goes”.
Here is my card for this challenge. A Christmas Card using different layers of the Concord & 9th Magnolia Wreath Stamp Set and matching die. I decided to use different paper products to differentiate the layers.
Top layer: Stamped on card with Altenew Ink and then a bit of Wink of Stella sparkle. I also cut this die cut into smaller parts to enable better positioning.
Second Layer: Stamped on Vellum with Hero Arts Unicorn White Pigment Ink
Third Layer: Plain die cut cardstock
Bottom Layer: Stamped on base card.

I used the “Joy” die from Taylored Expressions and triple embossed it with ZingMetallic Embossing Powder. The sentiment is from the same set and simply stamped in Altenew Ink. Fininshed off with a few Nuvo Crystal Drops in White (I may have gone a bit overboard on these!).


Thanks for stopping by.
Cardstock: Base Cardstock Advance A4 300gsm Long Grain Laser,
My Favorite Things White Cardstock, My Favorite Things Vellum
Other: Ozito Heat Gun, Big Shot Diecutting Machine, MISTI Stamping tool


Long time no blog…I believe it’s time to publish another post.
I am starting to get into the swing of Xmas cards now and this one turned out great for me. I used the Mama Elephant ‘Me and My Yeti’ and ‘Yeti Sentiments’ stamp sets as well as Hero Arts ‘Winter Scene’ for the background trees and Impression Obsession Christmas Tree dies for the foreground. Those trees were diecut out of Resene Paints paint chips.

The background is simply ink blended with Ranger Distress Oxide inks in Cracked Pistachio and Broken China and then stamped trees with three green oxide inks (Lucky Clover, Twisted Ciron and Peeled Paint).
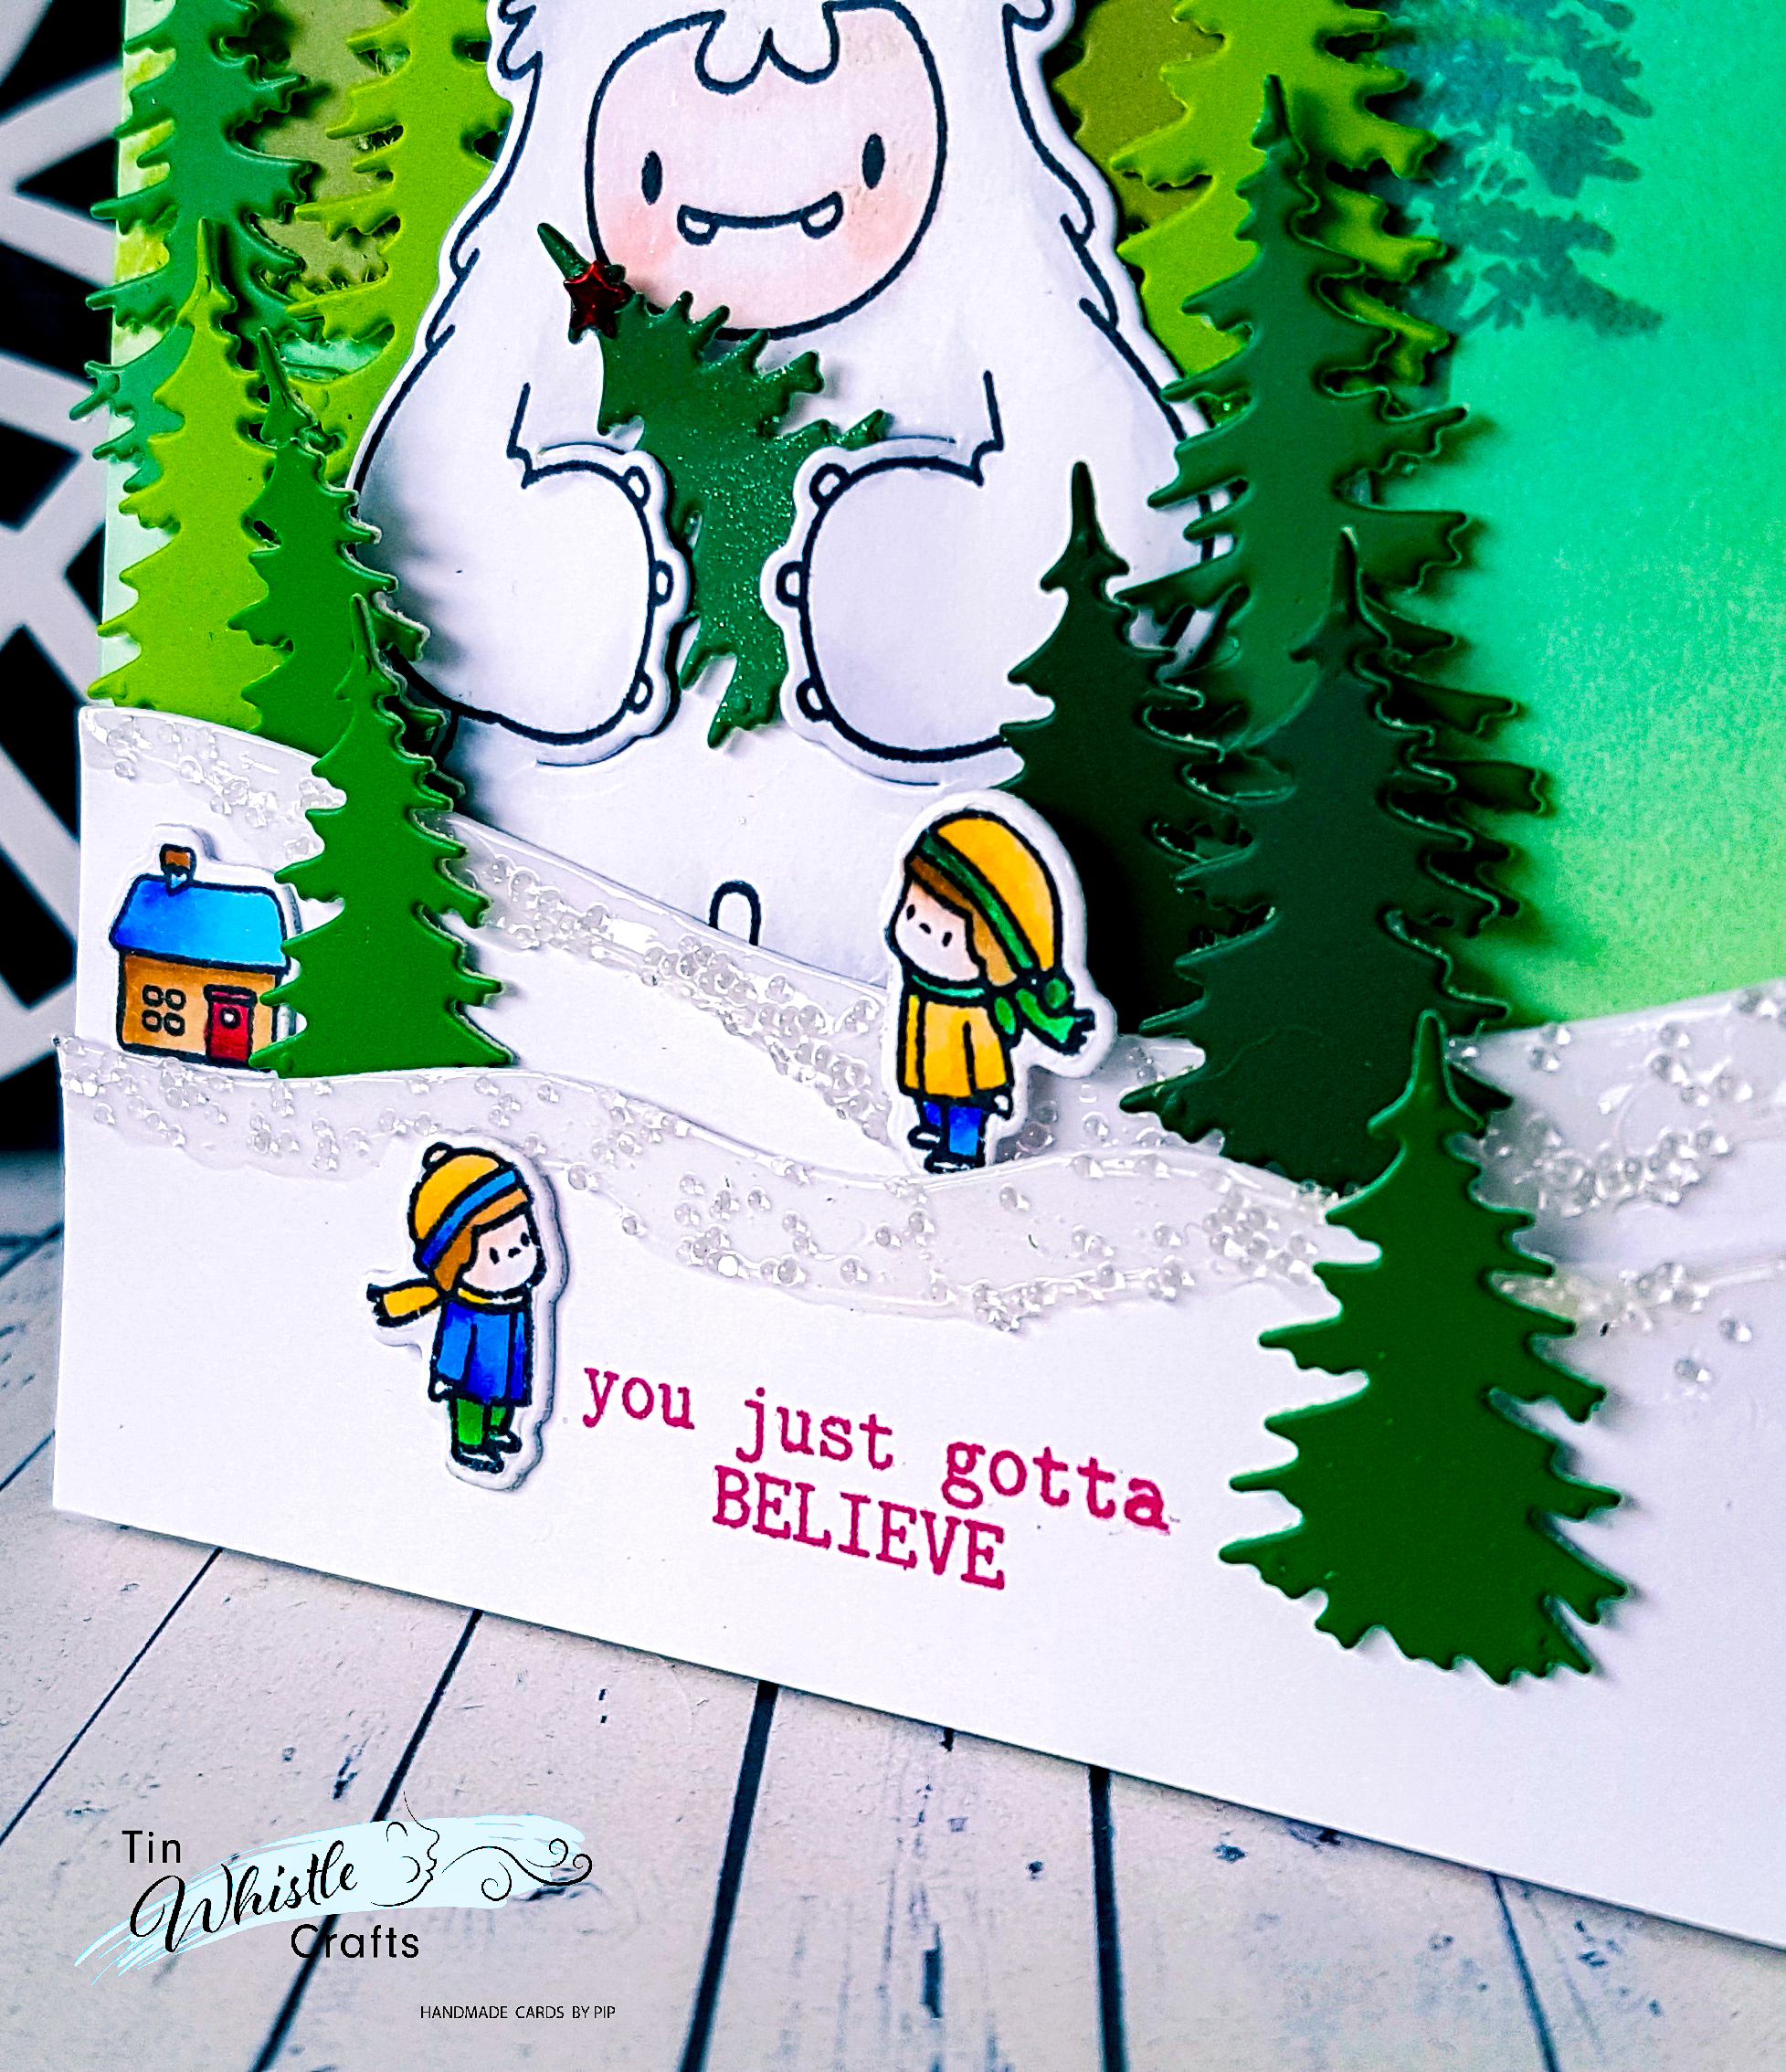
A new product I tried today was Liquitex Glass Beads Texture Gel. Its a transparent gel that you can also colour with paint, mixed with other mediums or paint directly over the top to achieve different looks. I just used it straight out of the tub and think it gives an icy look rather than an opaque white for snow. The hills were diecut with My Favorite Things ‘Surf and Turf’ die set. All the images were simply copic coloured.

Hope you enjoyed it and have a great day.
Stamps: Mama Elephant, Hero Arts
Dies: Impression Obsession, My Favorite Things
Colouring: Copics
Inks: Ranger Distress Oxides
Other Multi Media: Liquitex Glass Beads Texture Gel
Cardstock: Base Cardstock Advance A4 300gsm Long Grain Laser, Strathmore Bristol Smooth

