This is my CAS (Clean and Simple) card for the February CAS Card Exchange. This is something new that AAA Cards CAS Challenge has started on Facebook. We make a card for the theme, post it in the Facebook event post and at the end of the two weeks we send the card to another person who has also made a card.
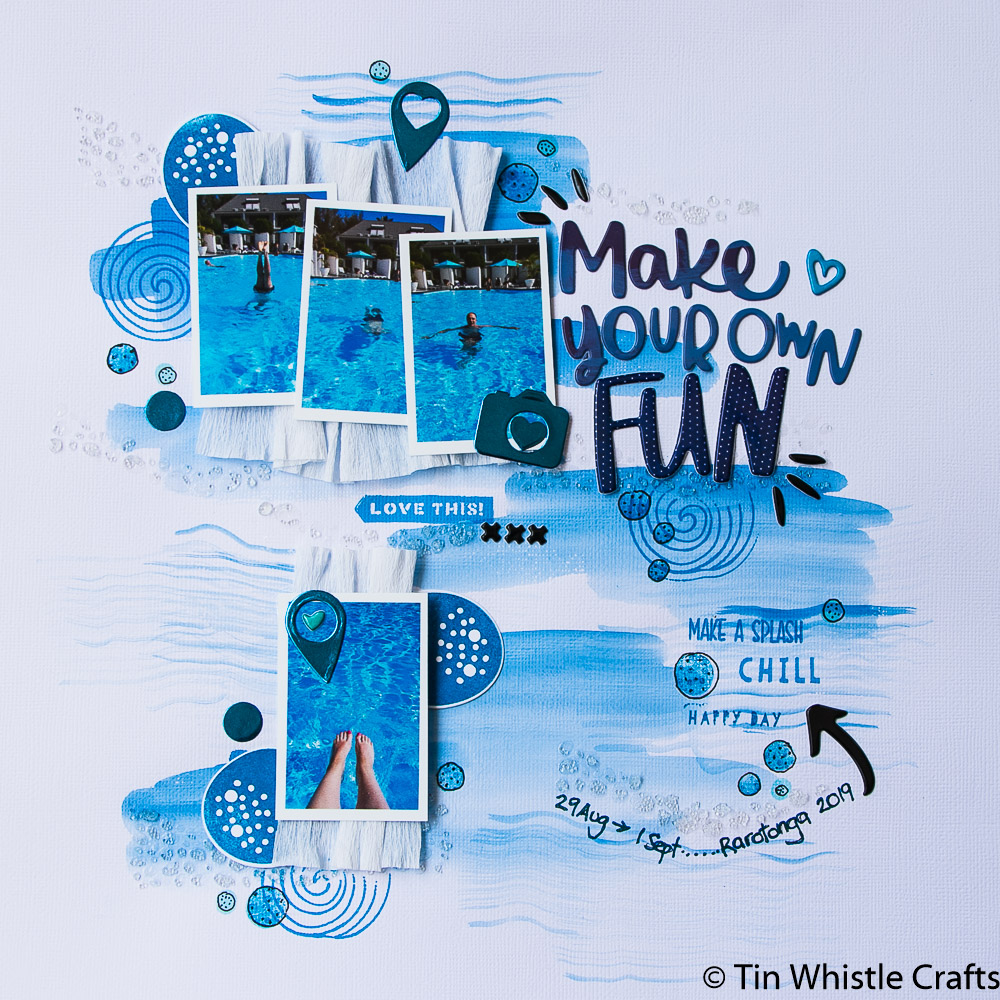
Hey everyone. I’m entering this layout in the current White with 1 challenge, and there was also a sketch as part of this challenge. I wanted to use these photos which are from a trip to Rarotonga we had in August 2019. I was full up with a cold at the time and I didn’t feel like swimming so I paddled my feet in the pool while my hubby entertained me, hence the Make your Own Fun title.
I’m trying to use my Brother ScannCut DX a bit more and I have some awesome cutting files that I want to use. I knew I had this svg file and am entering the finished card in the current Inspired by Challenge.
This is my latest card that I’ll enter into the Color Throwdownchallenge #554. I’m really enjoying incorporating stickers from a recent purchase but also making my own embellishments with what I have already in my supplies “a la scrapbooking” style.
The latest release frosm Stamping Bella includes some cute OddBall images. This card is entered into the latest The Library Challenge which bases the challenge theme on a book – using the cover, or title, or the story.
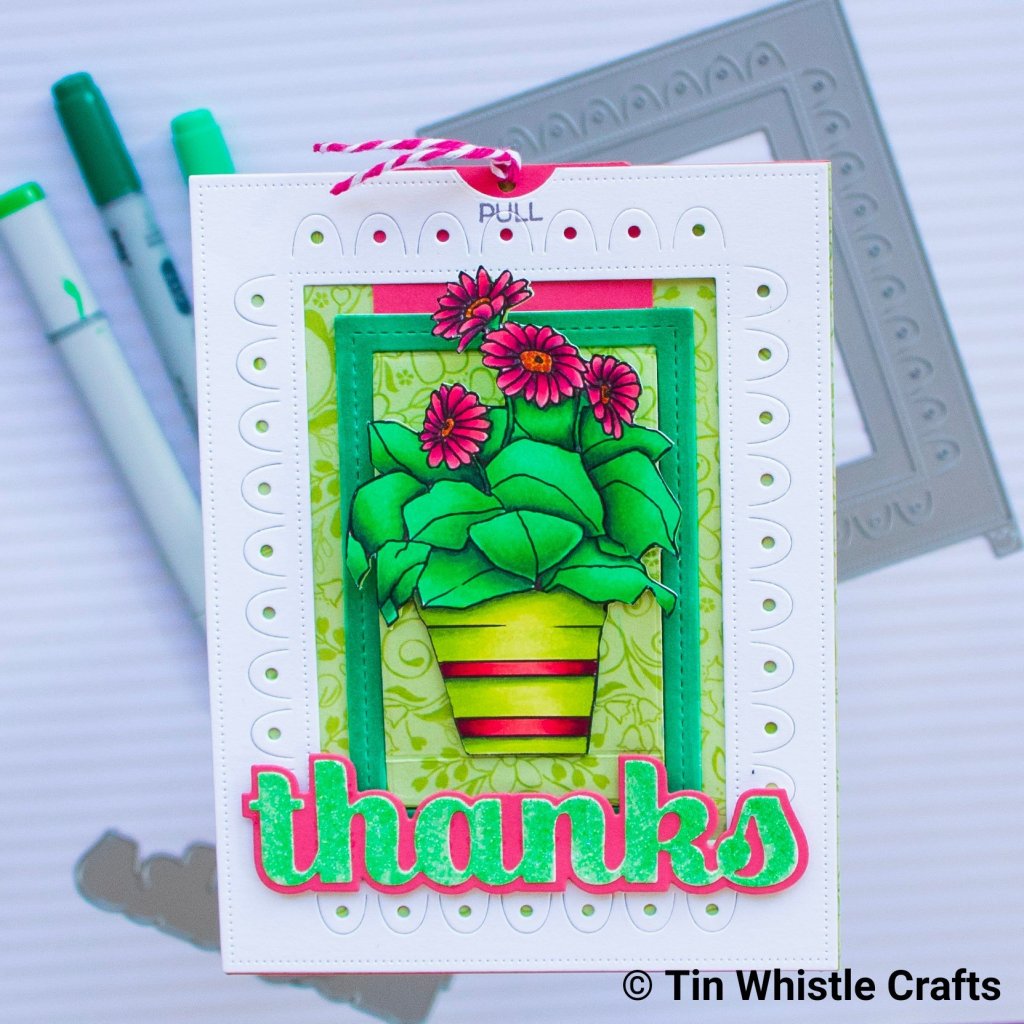
I used an image from one of the challenge sponsors A Day for Daisies – Potted Gerber Daisies and coloured it with Copics.
Other items
I created the base to be a sliding window card. I used the outside frame from the Mama Elephant Fancy Door Frame die set, parts of the Sunny StudioSliding Window Die and Memory Box – Stitched Rectangle Layers.
Sentiment
‘Thanks‘ die is from Birch Press which has the coordinating shadow. The word was cut out of white glitter paper and coloured with copics. The shadow was cut out of Lawn Fawn cardstock.
‘For Everything‘ was from the Altenew Inked Rose stamp set.
Tip: If you don’t have the right colour glitter card you can colour white or pearl glitter with copic markers. It will then coordinate with the rest of the card and still sparkle.
I’m thrilled to be a guest designer for the Sisterhood of Snarky Stampers latest Challenge #130 – Ombre. How many Ombre elements can I fit on one card? At least four as it turns out.
Images
Stamped AltenewLayered Cupcake images onto Neenah Solar White cardstock. As there are 2-3 layers for each part of the image I used AltenewGreen Meadows,Cherry Blossom and Coffee Break mini ink cubes – Ombre element 1.
Diecut with matching die.
Other items
Ink blend the three lightest Cherry Blossom inks over three pieces of Strathmore Bristol Smooth Cardstock (super easy to blend on) – Ombre element 2.
Using Concord & 9thBags and Tags die set, diecut edge of each of the pieces of cardstock.
Cut down to size for your card base.
Sentiment
Stamp out the banner and sentiment using Concord & 9thHere’s the Scoop stamp set.
The pole for the banners is the straw stamp in the same set and watercoloured using the same Altenew Inks listed in Image section. Perfect to add Ombre element – Ombre element 3.
Using the circle stamps in the Layered Cupcake stamp set randomly stamp over background in the Coffee Break ink cube colours to create an ombre look – Ombre element 4.
FINISHING
Using ATG adhere background to card base.
Adhere pink tablecloth cardstock in layers with foam tape.
Adhere cupcakes and banners with foam tape to add dimension (see closeup above).
Using darkest of the pink inks ink blend around the bottom edge of the card base.
Thanks for stopping by and have a good day.
Handmade by Pip
Affiliate links are used when purchasing from Krafters Cart. Other links are direct to the company that sells that product.
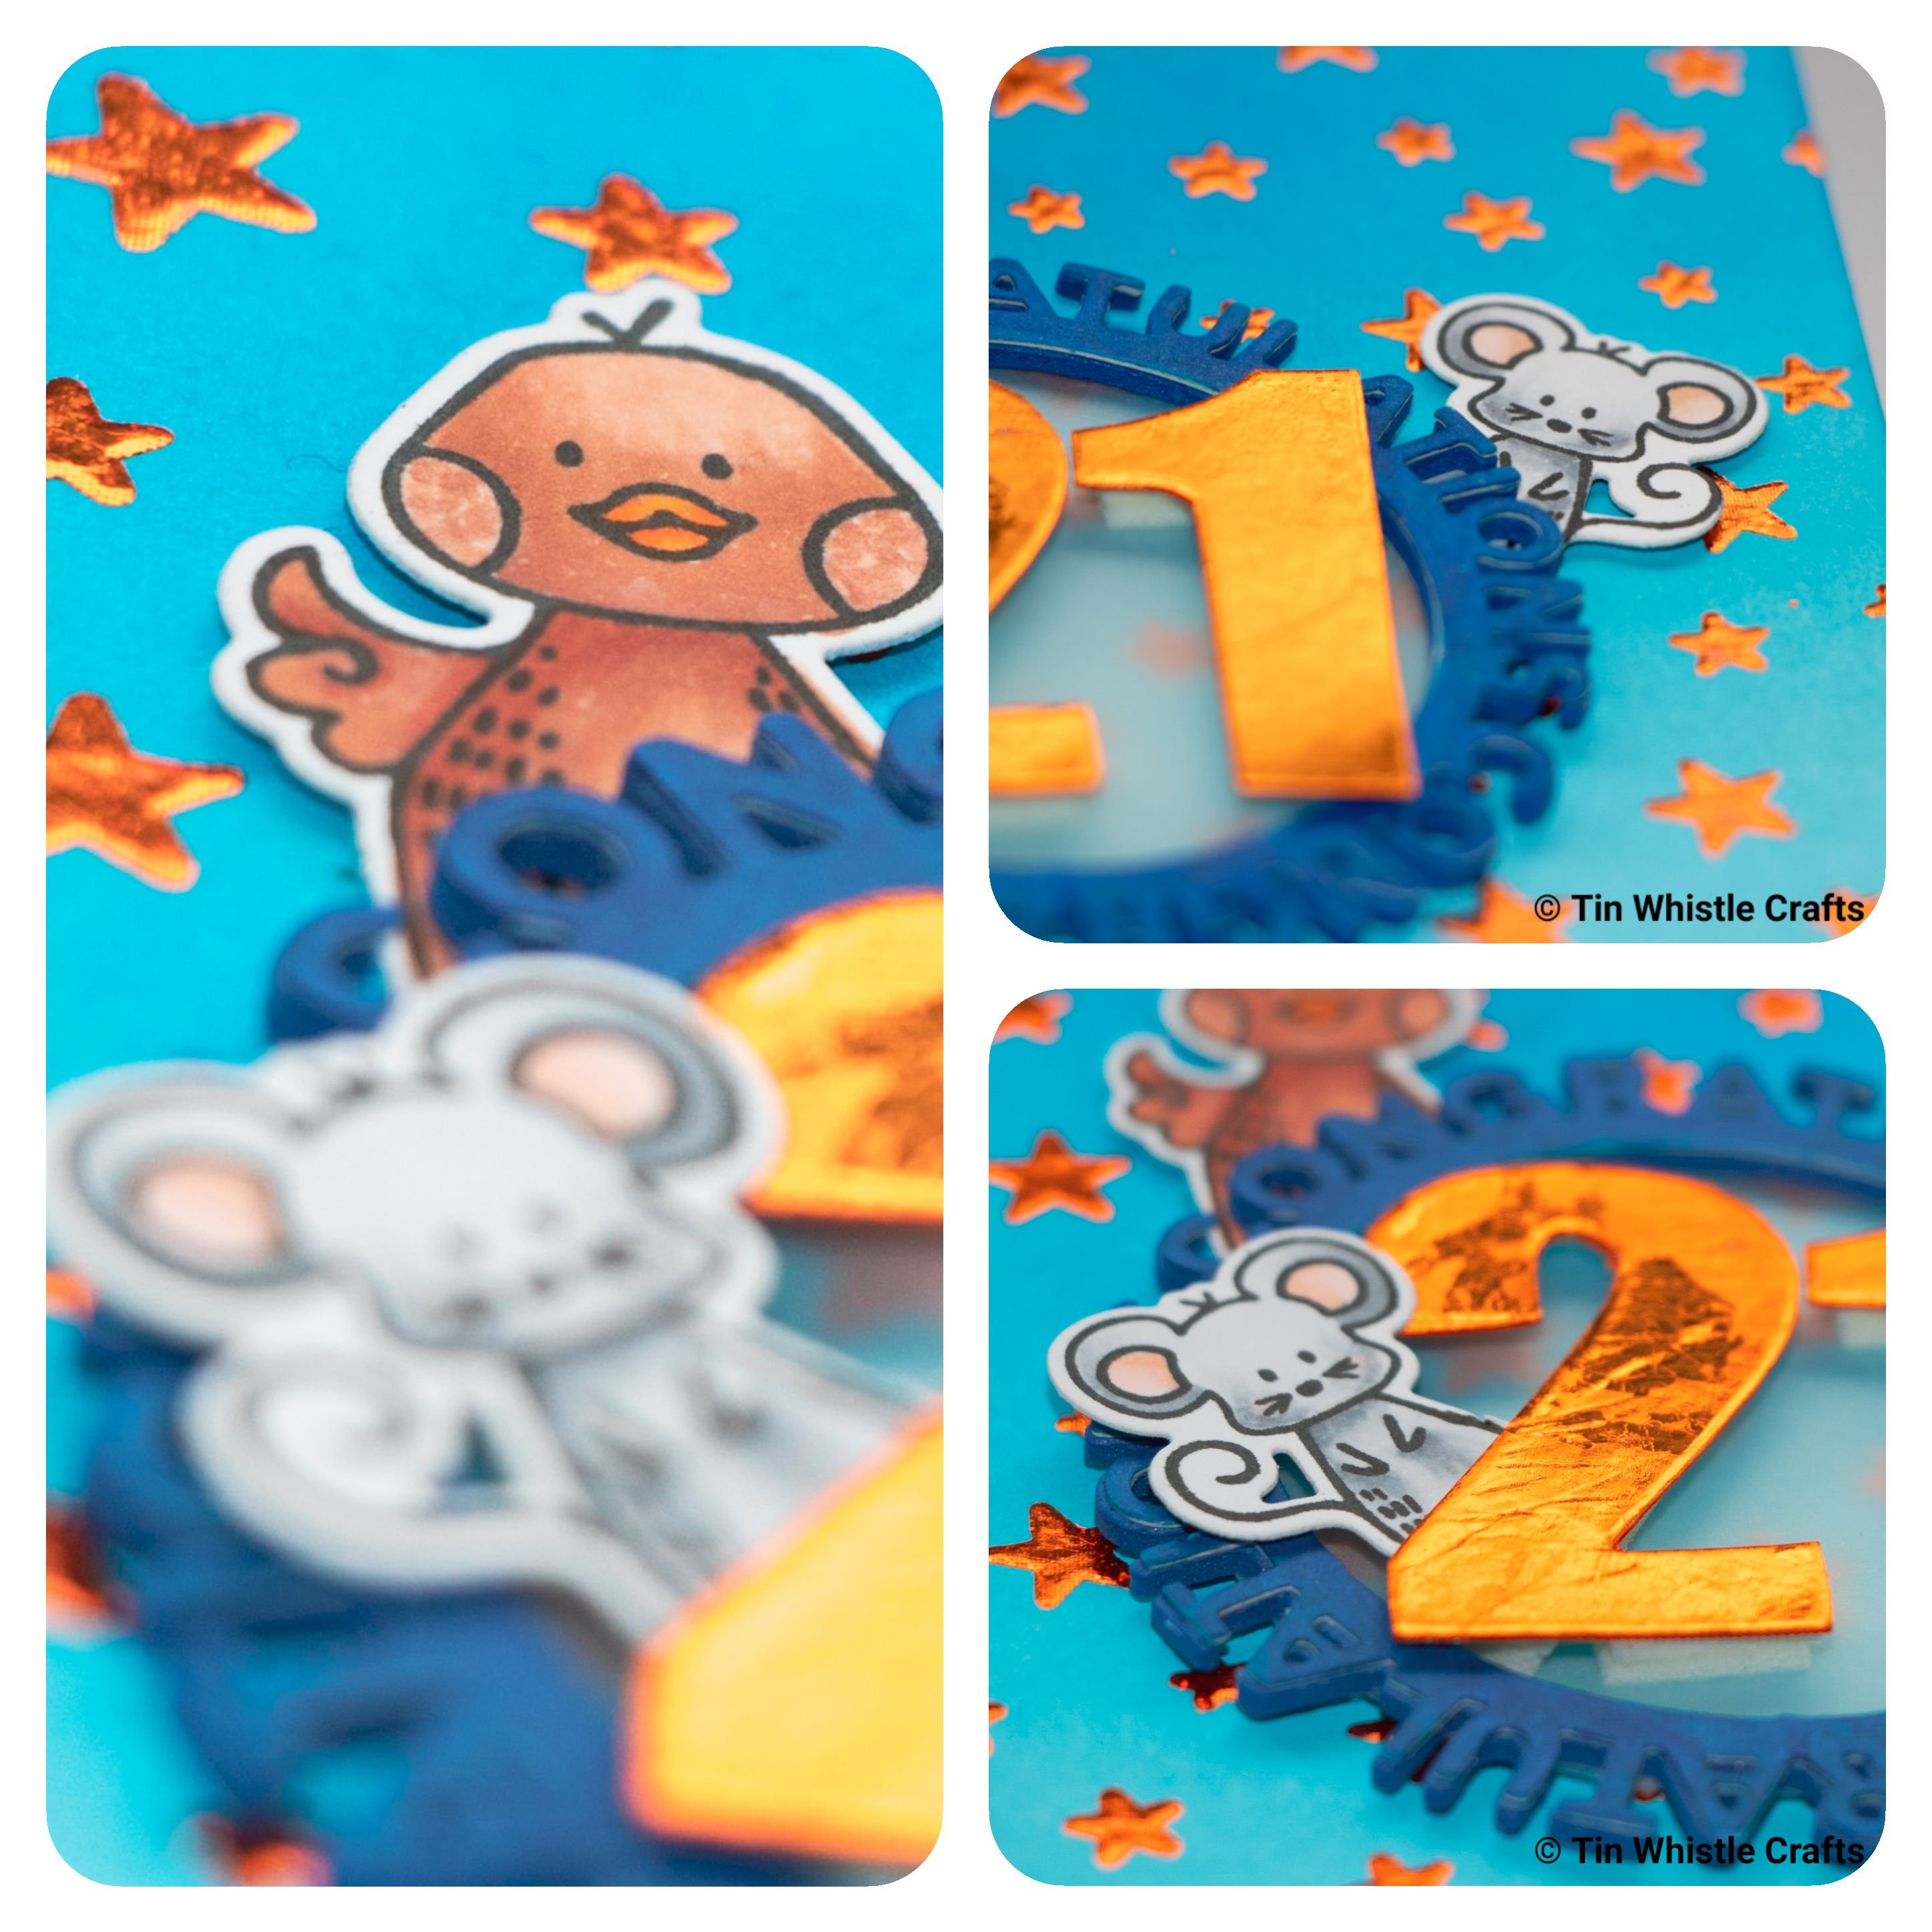
A new card created for a family member. I wanted to try a new technique for the background I had seen recently and it worked perfectly…foiling with gel medium.
Images
I used the WaffleFlower Little Painters images as they are designed to poke out from behind another image, plus they’re very cute.
Stamp your images on copic friendly cardstock with MomentoTuxedo Black or another copic friendly ink.
Colour with alcohol markers.
Cut out with matching dies, Brother Scanncut or fussy cut.
Background
Ink blend background with Distress Oxide Inks in SaltyOcean and Tumbled Glass and MermaidLagoon. Leave to dry.
Place stencil – My Favorite ThingsStar Celebration – onto card and tape down to crafting surface to stop stencil and card moving.
Using a palette knife spread Atelier Heavy Gel medium over stencil.
Remove stencil carefully and leave panel to dry.
Tip: The gel medium is dry when the gel becomes transparent and drying times will vary due to climate.
Foiling
Heat up laminator – Mine is the Heidi Swapp Mini Minc machine.
Place a sheet of foil over the dry panel. I used Gina K DesignHeat Reactive Foil.
Place panel and foil in a carrier pouch – you can use a folded piece of copy paper if you don’t have the pouches.
Run through laminator. I set the heat at a 4. The heat will reactive the gel medium to make it sticky and the foil will adhere to it.
Extra items
Congratulations
Cut out My Favorite ThingsCongratulation circle die out of white cardstock and once out of blue fun foam. Using a blue marker that matches the blues in the card colour the die cuts.
Adhere the coloured die cut onto the foam one.
Cut out a piece of vellum with a circle die and adhere to the back of the stacked die cuts.
Foiling Numbers
Cut the numbers out of cardstock using AltenewBold Numeral dies.
Use the negative portion like a stencil and place on top of another piece of cardstock.
Using a palette knife spread Atelier Heavy Gel medium over numbers then remove stencil.
Leave to dry, place foil over top and run through a laminator as you did for the background stars.
Fussy cut around the numbers or use the original dies to recut the foiled numbers.
Finishing
Adhere the critters when you want them positioned. The two back ones are adhered to the congratulations and the front one is adhered to the number.
Adhere the numbers with two layers of foam tape to give them dimension and make them slightly higher than the die cut words.
Finally adhere the central images to the background and adhere panel to side or top folded cardstock.
Thanks for stopping by and have a good day.
Handmade by Pip
Supplies List
Affiliate links are used when purchasing from Krafters Cart. Other links are direct to the company that sells that product.
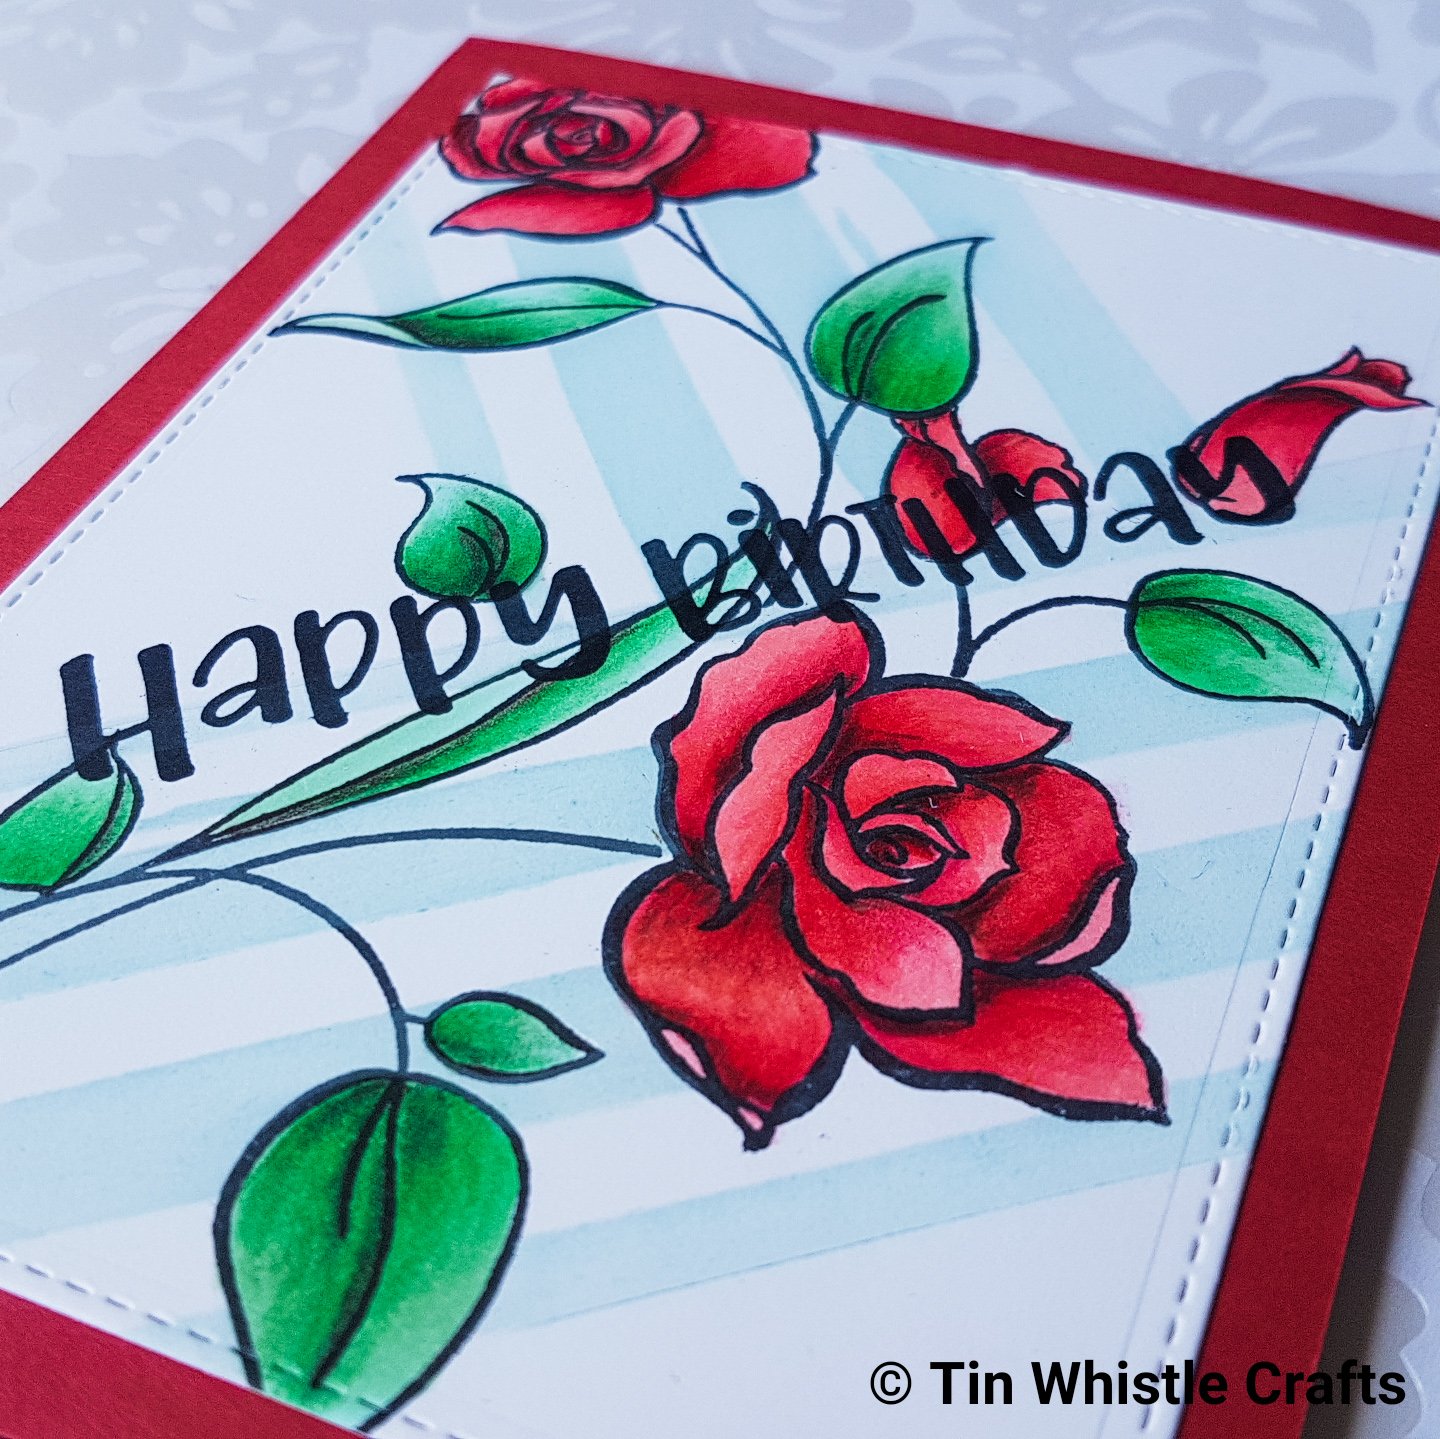
New challenge #304 on the CAS(E) this Sketch blog. This was a challenging sketch but happy with the one layer card I ended up creating.
Image
I started by selecting the stamp set from Altenew Amazing You.
Stamp the images on copic friendly cardstock with Momento Tuxedo Black Ink.
Colour images with alcohol markers and added extra depth with Prismacolor Pencils.
Background
I wanted to added the stripes from the sketch behind the flowers so I stamped the images again on masking paper and cut them out with my Brother Scanncut DX1200 (with an outline setting of -1).
After applying the masks to the design I placed the Altenew Watercolor Stripes stencil over the top and taped it down to stop it moving.
As the design was going in different directions I taped off the portions of the card that I didn’t want to apply the design on, starting with the top left corner.
I used Clarity stencil brushes to apply Distress Oxide Tumbled Glass over the stencil.
Turn the stencil and tape down on bottom corner and apply more ink.
Sentiment and finishing
Stamp Ranger Letter-it Happy Birthday sentiment with Mini Misti in Versafine Claire Nocturne. I love this pigment ink for sentiments.
Cut down panel with My Favorite Things Blueprints 29 which gives a faux stitched outline to the card.
Adhere to a side folded card base in matching coloured cardstock using double sided tape.
Thanks for stopping by and have a good day.
Handmade by Pip
Supplies List
Affiliate links are used when purchasing from Krafters Cart. Other links are direct to the company that sells that product.